
Ever felt like web design was a secret club you weren’t part of? With the Webflow interface, you don’t need a membership card or even a coding degree. Imagine crafting stunning, responsive websites with just a few clicks and drags. This guide will demystify Webflow’s powerful features, showing you how to turn your design dreams into reality without breaking a sweat. Let’s dive into the world of easy, code-free web design!
Table of Contents
- Introduction to the Webflow Interface
- Navigating the Webflow Interface
- Visual Design and Responsiveness
- Interactions and Animations in Webflow
- Webflow Interface for Different Audiences
- Enhancing Usability and Performance
- Educational Resources and Support
- Conclusion
Introduction to the Webflow Interface
Welcome to the world of Webflow, a game-changer in the realm of web design. If you’ve ever wished for a tool that combines the ease of a visual editor with the power of code-free design, the Webflow interface is your new best friend. This platform is all about creating stunning websites without touching a single line of code, making it a dream come true for designers and developers alike. Dive deeper into the world of Webflow and discover how Webflow web designers bring this magic to life.
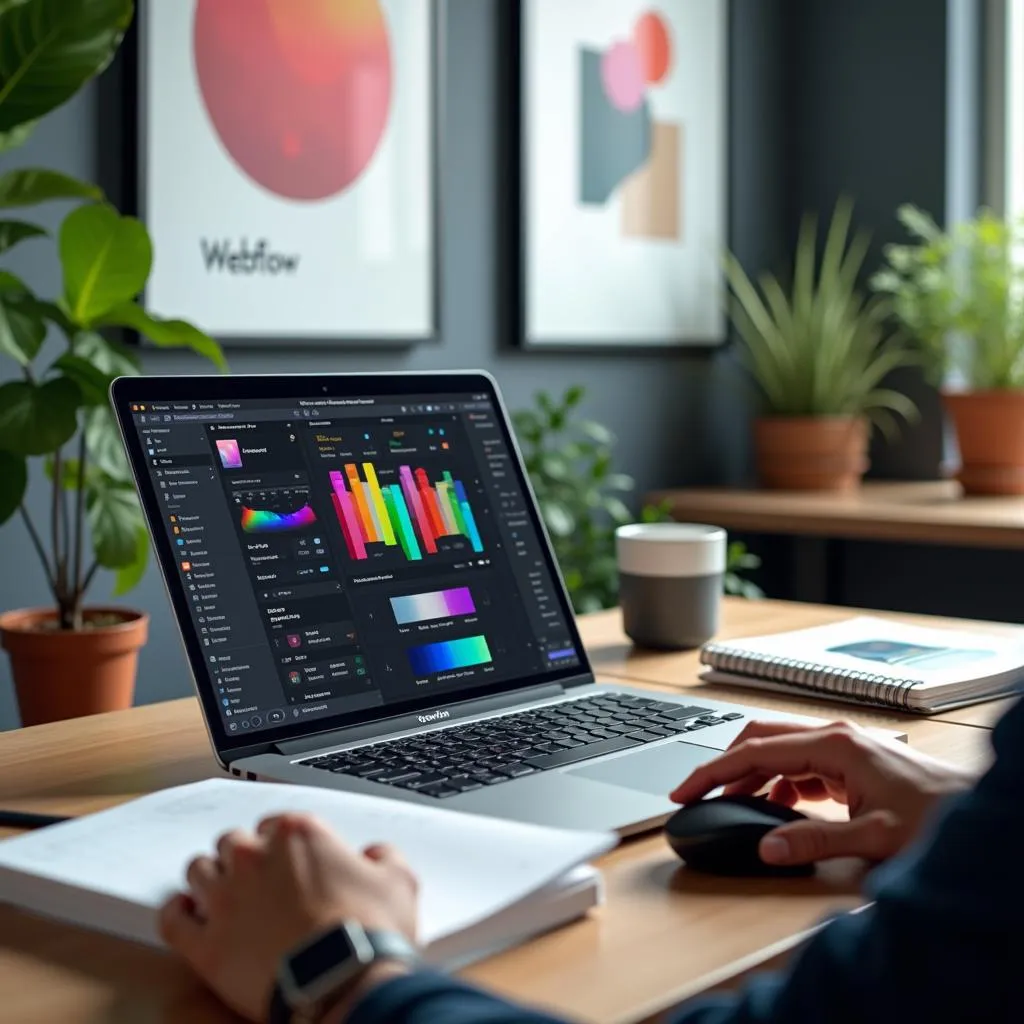
The Webflow interface is designed to offer a seamless, visual design experience. It’s like a playground for your creativity, where you can see your changes in real-time as you work. This article will take you on a guided tour through the main components of the Webflow interface, including the Designer Panel, Navigator, Style Panel, and more. So, buckle up and get ready to dive deep into each element that makes this tool so powerful and intuitive. For a comprehensive look at how Webflow is transforming web design, check out the ultimate guide to Webflow website design.
Navigating the Webflow Interface
Navigating the Webflow interface might seem a bit overwhelming at first glance, but once you get the hang of it, you’ll find it to be a powerful ally in your web design journey. Let’s break down the key components and advanced features that make the Webflow interface both intuitive and efficient.
Key Components of the Webflow Interface
A solid understanding of the Webflow interface’s key components will set the foundation for your design projects. Here’s what you’ll be working with:
-
Designer Panel: This is your main workspace and where the magic truly happens. With a WYSIWYG (What You See Is What You Get) experience, the Designer Panel allows you to build and style your website visually, offering real-time feedback on your designs. It’s where creativity meets practicality, enabling you to see your changes as you make them. If you’re looking to dive deeper into the potential of Webflow, check out this ultimate guide for creatives to revolutionize your design process.
-
Navigator: Think of the Navigator as the blueprint of your website. It provides a hierarchical view of all the elements on your page, making it easier to select and organize them. This feature is particularly handy for managing complex page structures and ensuring everything is in its rightful place.
-
Style Panel: When it comes to customizing the appearance of your elements, the Style Panel is your best friend. From typography tweaks to spacing adjustments, it offers detailed control over your design. It’s like having a digital paintbrush that you can use to perfect every pixel.
-
Assets Panel: This is your go-to spot for managing media files. Whether you’re dealing with images, videos, or other media, the Assets Panel provides a centralized location to upload, organize, and access your assets efficiently.
-
Settings Panel: For configuring element-specific settings and interactions, the Settings Panel is essential. It allows you to add custom attributes and set up interactions, giving you more control over the finer details of your site.
-
Add Panel: Need to add new elements quickly? The Add Panel makes this process a breeze with a variety of pre-built components like buttons, forms, and sliders. It’s designed to streamline your design process, so you can focus more on creativity and less on logistics.
Advanced Features for Efficient Navigation
To truly master the Webflow interface, tapping into its advanced features is key. These tools are designed to enhance your workflow and amplify your design capabilities:
-
Keyboard Shortcuts: Speed is the name of the game, and keyboard shortcuts are your secret weapon. For instance, using
CMD+E(orCTRL+Eon Windows) lets you add elements without opening the Add Panel, streamlining your workflow and saving valuable time. -
Breakpoints for Responsive Design: One of Webflow’s standout features is its responsive design capabilities. Breakpoints allow you to create layouts that adapt to various device sizes. By starting with the desktop view and working down to tablet and mobile breakpoints, you ensure that your design looks impeccable on every screen. For more in-depth insights on this, you might find the guide to mastering the Webflow design system particularly useful.
In summary, understanding these components and features of the Webflow interface will not only make navigation more intuitive but also significantly enhance your web design efficiency. As you get comfortable with these tools, you’ll find that the Webflow interface becomes an indispensable part of your design toolkit.
Visual Design and Responsiveness
When it comes to creating visually appealing websites that look great on any device, the Webflow interface has got you covered. This section will delve into how Webflow bridges the gap between aesthetics and functionality through its responsive design tools.
Responsive Design Tools in Webflow
The beauty of the Webflow interface lies in its ability to help you design for multiple devices seamlessly. Here’s how it achieves that:
-
Default and Custom Breakpoints: Webflow starts you off with default breakpoints for desktop, tablet, and mobile. These ensure that your designs look fantastic on the most common devices. But it doesn’t stop there—you can add up to three custom breakpoints. This is incredibly handy for targeting specific screen sizes or creating ultra-responsive designs. For more insights on using Webflow effectively, you might want to check out Webflow UX Design, which covers transforming your creative process with Webflow.
-
Viewport Units: These units, such as VW (viewport width) and VH (viewport height), are essential for building scalable elements. They ensure your design components adjust dynamically as the viewport size changes, maintaining consistency and balance across devices. If you’re looking to dive deeper into mastering these tools, Master The Webflow Design System provides an ultimate guide.
-
Flexbox and Grid: Two of the most powerful layout tools in Webflow. Flexbox allows for flexible layouts with minimal effort, perfect for aligning elements. Meanwhile, the CSS Grid gives you the power to create complex, grid-based layouts that are both responsive and visually stunning. These tools eliminate the need for custom code, making your design process a breeze. If you’re curious about how these features can elevate your design work, Mastering Webflow Design is a great resource.
-
Responsive Images: Webflow automatically optimizes images for different device sizes, which means your site will load faster and look sharp on any screen. It’s a feature that not only enhances user experience but also boosts SEO by improving page speed. The Ultimate Guide To Website Design With Webflow might provide you with additional strategies to leverage these features effectively.
Comparison Table: Webflow vs. Traditional Design Tools
Let’s take a closer look at how Webflow stacks up against traditional web design tools like Wix and Squarespace in terms of responsive design capabilities:
| Feature | Webflow Interface | Traditional Design Tools (e.g., Wix, Squarespace) |
|---|---|---|
| Responsive Design | Built-in, with customizable breakpoints | Limited and often requires additional adjustments |
| Flexbox and Grid | Fully integrated with visual controls | Basic support, often requires coding |
| Viewport Units | Supported with intuitive interface | Often requires manual coding |
| Responsive Images | Automatic optimization | May require third-party plugins or manual setup |
This comparison highlights Webflow’s strengths in providing a more intuitive and comprehensive responsive design experience, which is crucial for modern web design.
The Webflow interface makes it easy to create visually stunning and responsive websites without the hassle of coding. Its responsive design tools offer flexibility and precision, helping you craft websites that look great on any device. Whether you’re a seasoned designer or just starting out, Webflow’s tools make it accessible and efficient to produce professional-grade sites.
Interactions and Animations in Webflow
Welcome to the magical realm of Interactions and Animations within the Webflow interface! This section is all about bringing life to your designs without the fuss of coding. Whether you’re looking to add a little flair or create an immersive user experience, Webflow has got your back with its robust set of tools.
Understanding the Interactions Panel
The Interactions Panel in Webflow is like your animation control center. It lets you build dynamic and engaging websites by simply clicking and dragging, rather than coding. If you’re keen on diving deeper into how Webflow transforms your creative process, check out how Webflow UX Design is revolutionizing design workflows.
- Trigger Points: These are the cues that tell your animations when to start. You can set them up for various events like mouse clicks, hovers, or scrolls. Think of them as the directors of your animation sequences.
- Animation Properties: Here, you control the finer details like duration, easing, and delays. This is where you tweak your animations to perfection, ensuring they run smoothly and look professional.
- Visual Editor: Forget complex coding! The visual editor in Webflow lets you manage animations in a straightforward, user-friendly way. It’s a playground for both beginners and seasoned designers looking to add depth to their projects.
Types of Animations
Webflow offers a diverse range of animations to enhance your website’s interactivity:
- Scroll-Based Animations: These create a parallax effect as users scroll through your site. It’s like giving your content a dance partner that moves gracefully with user interaction.
- Hover and Click Animations: These animations react to user actions like hovering or clicking, adding a layer of interactivity that keeps users engaged.
- Micro-Interactions: These are subtle animations that provide feedback or guide users. Whether it’s a button that animates when clicked or a field that highlights when filled, these small touches make a big difference.
Best Practices for Animations
While animations can significantly enhance user experience, it’s essential to use them wisely:
- Enhance, Don’t Distract: Use animations to draw attention to important content or to guide users. Avoid using them excessively, which can overwhelm or distract your audience.
- Performance Considerations: Keep an eye on the performance impact. Too many animations can slow down your site, so optimize them to ensure quick load times.
- Consistency: Stick to a consistent animation style throughout your site to create a cohesive user experience. This helps in maintaining a professional look and feel.
Comparison Table: Webflow vs. Traditional Coding
Let’s see how Webflow’s animation capabilities stack up against traditional coding methods:
| Feature | Webflow Interface | Traditional Coding |
|---|---|---|
| Ease of Use | Visual, drag-and-drop interface | Requires coding knowledge |
| Animation Creation | No coding required, visual setup | Requires CSS/JavaScript expertise |
| Customization | Extensive options with visual controls | Highly customizable but complex |
| Integration | Supports After Effects and Lottie | Requires manual integration |
| Performance Optimization | Built-in tools for optimization | Requires manual optimization |
Screenshots and Videos
To truly grasp the potential of Webflow’s Interactions and Animations, seeing them in action can be incredibly helpful. Check out Webflow University for tutorials and examples that showcase how you can effectively use the Interactions Panel to create stunning animations.
By leveraging the Webflow interface for animations, you can transform your static designs into interactive, user-friendly websites that captivate and engage your audience. Whether you’re just starting out or looking to refine your skills, Webflow provides the tools you need to bring your creative visions to life. If you’re curious about how to transform your designs into Webflow, there’s a fantastic guide on Transform Your Designs Into Webflow that can walk you through the process.
Webflow Interface for Different Audiences
The Webflow interface is not just a one-size-fits-all solution; it’s tailored to meet the needs of a diverse audience. Whether you’re a designer, developer, entrepreneur, or marketing professional, Webflow offers unique features that cater to different requirements and skill levels. Let’s explore how various audiences can leverage the Webflow interface to achieve their goals.
Target Audience
Designers
For designers, the Webflow interface is a dream come true. It empowers you with a visual editor that allows for a high level of creativity without writing code. You can build stunning, responsive websites with drag-and-drop functionality, offering a seamless design experience. Webflow’s visual editor is particularly attractive because it provides the freedom to experiment with design layouts and aesthetics, making it a favorite among creative professionals.
Developers
While Webflow is a no-code platform, it doesn’t leave developers out in the cold. Developers can benefit from Webflow’s code export feature, which allows for clean, production-ready HTML, CSS, and JavaScript. This capability is particularly useful for integrating Webflow designs into larger projects or when custom development is necessary. Having the ability to dive into the code offers a balance between visual design and technical customization. If you’re looking to dive even deeper into the design aspect, check out the possibilities with custom Webflow store design.
Entrepreneurs and Small Business Owners
For entrepreneurs and small business owners, the Webflow interface provides an intuitive platform to quickly establish an online presence. You don’t need extensive technical knowledge to create a professional-looking website. Webflow’s easy-to-use interface means you can focus more on your business and less on the complexities of web development, allowing you to launch your site faster and more efficiently. And if you’re interested in scaling your business, take a peek at Webflow Plus Solutions for some great insights.
Marketing Professionals
Marketing professionals will find Webflow’s robust CMS and integration capabilities ideal for managing dynamic content. The platform supports seamless integration with various marketing tools, which helps in implementing strategies and managing campaigns effectively. Webflow makes it easy to update and manage content, which is essential for keeping your audience engaged and your website relevant. For those looking to maximize their strategies, expert tips for Webflow success could provide some valuable insights.
Use Cases
Portfolio Websites
Webflow is an excellent choice for creating portfolio websites. It allows you to showcase your work with custom animations and a professional design that reflects your brand. With Webflow, you can add dynamic animations that make your portfolio interactive and engaging, helping you stand out from the crowd.
E-commerce Sites
Creating e-commerce sites with Webflow is straightforward due to its built-in functionalities. You can manage products, track sales, and even customize the shopping experience for your customers. Webflow’s e-commerce capabilities provide all the tools you need to run an online store efficiently. If you’re curious about performance improvements, Webflow performance optimization is a must-read to ensure a smooth user experience.
Blogs and Content Sites
For blogs and content-rich websites, Webflow’s CMS is a game-changer. It allows you to manage, update, and optimize your content with ease. Built-in SEO tools ensure your content is visible to search engines, helping you reach a broader audience. The ability to schedule and automate content updates streamlines the management process, making it a favorite among content creators.
Business Websites
Webflow is perfect for building professional business websites that are both aesthetically pleasing and functional. Its responsive design tools ensure your website looks great on any device, providing a consistent user experience. Webflow’s integration capabilities also allow you to incorporate various business tools, enhancing your site’s functionality and user engagement.
Comparison: Webflow vs. Traditional Web Development
| Feature | Webflow Interface | Traditional Web Development |
|---|---|---|
| Ease of Use | Drag-and-drop, no coding required | Requires coding knowledge |
| Design Flexibility | High, with visual editor and customizations | Depends on developer skills |
| Time to Launch | Quick, with pre-built templates available | Longer, due to coding and testing |
| Cost | Subscription-based, with various plans | Varies, often higher due to development costs |
| SEO and Performance | Built-in tools for optimization | Requires additional plugins or coding |
The Webflow interface offers a versatile platform suitable for a wide range of users and use cases. Its ability to cater to different audiences makes it a valuable tool in the web design and development landscape. Whether you’re crafting a personal portfolio, setting up an online store, or managing a blog, Webflow provides the tools and flexibility needed to bring your vision to life.
Enhancing Usability and Performance
The Webflow interface is designed to streamline your workflow and boost website performance, making it a powerful tool for both beginners and seasoned designers. Let’s explore some practical tips and built-in features that can significantly enhance your web design process.
Tips for Optimizing Your Workflow
Efficiency is key when it comes to designing websites. Here are some tips to help you optimize your workflow using the Webflow interface:
-
Keyboard Shortcuts: Mastering keyboard shortcuts can greatly speed up your design process. For instance, using shortcuts like
CMD+E(orCTRL+Eon Windows) allows you to add elements quickly, without navigating through menus. This minimizes interruptions and keeps your creative momentum going. -
Style Manager: Keeping your styles organized is essential for maintaining consistency across your project. The Style Manager in Webflow helps you manage and update styles efficiently, ensuring that changes are applied globally across your site. This feature is especially useful for making large-scale updates to your design with minimal effort. For a deeper dive into how Webflow designs can be a game-changer for your site, you might find it worthwhile to explore more.
-
Responsive Previews: Before publishing, it’s critical to test your design across different devices. Webflow’s responsive preview mode lets you see how your design adapts to various screen sizes, allowing you to make necessary adjustments before going live. This ensures a seamless user experience regardless of the device being used.
Accessibility and SEO Features
Webflow comes equipped with robust tools to improve your site’s accessibility and search engine visibility, which are vital for reaching a broader audience and enhancing user experience.
-
SEO Tools: Webflow provides built-in SEO capabilities that help improve your site’s visibility in search engine results. You can easily manage meta tags, alt text, and URL structures directly within the Webflow interface. These features are designed to optimize your content for search engines, driving more traffic to your site. To really master how Webflow design systems can boost your online presence, check out more detailed guidance available.
-
Accessibility Options: Making your website accessible to all users, including those with disabilities, is not only ethical but also beneficial for SEO. Webflow offers a range of accessibility features, such as ARIA labels and semantic HTML tags, to ensure that your site is inclusive and user-friendly. If you want to transform your creative process through Webflow UX design, there are resources that delve deeper into this aspect.
Incorporating these features into your workflow can greatly enhance the usability and performance of your website, making it more efficient and appealing to users. By leveraging the Webflow interface effectively, you can create websites that are not only visually stunning but also optimized for performance and accessibility.
Educational Resources and Support
When it comes to mastering the Webflow interface, having access to quality educational resources and support can make all the difference. Whether you’re a seasoned pro or just starting out, getting the hang of all the features Webflow offers can be a bit overwhelming. Fortunately, Webflow provides an array of resources to help you along the way.
Leveraging Webflow University
Webflow University is a treasure trove of tutorials, courses, and resources designed to help you become proficient with the Webflow interface. Here’s why it’s a game-changer:
-
Comprehensive Tutorials: From beginner courses to advanced design tutorials, Webflow University covers a wide range of topics. It’s perfect for learning the basics or diving into more complex features. You can explore everything from creating simple layouts to crafting intricate animations without writing any code.
-
Video Lessons: Prefer to learn by watching? Webflow University offers video lessons that walk you through various features of the Webflow interface. These videos are concise, informative, and provide visual demonstrations that make complex concepts easier to grasp.
-
Community Support: Sometimes, the best way to learn is by connecting with others. The Webflow community is active, friendly, and always ready to help fellow users. Whether you’re stuck on a problem or looking for feedback on your design, joining the community can provide valuable insights and support.
-
Additional Resources: Beyond tutorials and videos, Webflow University offers articles, guides, and webinars that dive into specific topics. This wealth of information ensures you have all the tools you need to succeed. For instance, if you’re keen on honing your design skills, exploring how Webflow UX Design can transform your creative process might be just what you need.
Key Benefits of Webflow University
- Self-Paced Learning: Learn at your own pace and revisit lessons as needed. This flexibility is ideal for fitting learning into a busy schedule.
- Expert Instructors: Content is created by Webflow experts, ensuring you receive accurate and reliable information.
- Hands-On Projects: Apply what you’ve learned through practical exercises and projects, reinforcing your understanding.
Exploring Additional Support Options
In addition to Webflow University, there are other ways to get support and enhance your understanding of the Webflow interface:
-
Webflow Blog: Stay updated with the latest features, tips, and best practices by following the Webflow Blog. It’s a great resource for continuous learning and staying ahead of the curve.
-
Interactive Forums: Engage with other Webflow users in the Webflow Community Forum. It’s a space to ask questions, share knowledge, and get advice from experienced designers.
-
Customer Support: If you’re facing technical issues or need specific guidance, Webflow’s customer support team is available to assist you. They can help resolve issues and provide information tailored to your needs.
By leveraging these resources, you can enhance your skills and make the most out of the Webflow interface. Whether you’re building your first site or refining a complex project, these educational and support options are invaluable tools in your web design journey.
Conclusion
The Webflow interface stands out as an exceptional tool for building visually stunning, responsive websites without the need for coding. It bridges the gap between design and development, empowering users to bring their creative visions to life with ease. Through this article, we’ve explored the myriad components and features that make Webflow an indispensable platform for anyone looking to create a professional online presence.
Power and Versatility
One of the key strengths of the Webflow interface is its versatility. Whether you’re a designer, developer, or business owner, Webflow caters to a broad spectrum of needs. Designers appreciate the visual editor’s flexibility, while developers benefit from features like code export, enabling seamless integration into larger projects. Entrepreneurs and small business owners can quickly establish their online presence, and marketing professionals enjoy the robust CMS and integration capabilities. This broad appeal emphasizes Webflow’s power as a comprehensive web design tool, addressing needs across different user groups.
User-Friendly Transition from Design to Production
Webflow simplifies the transition from design to production. Its intuitive interface allows for real-time visual feedback, reducing the complexity and time traditionally associated with web development. The platform’s focus on responsive design ensures that sites look great on any device, enhancing user experience and engagement. By eliminating the need for extensive coding knowledge, Webflow democratizes web design, making it accessible to a wider audience.
Benefits for Different User Groups
- Designers: Enjoy the freedom to experiment and create without writing code. For more insights, you might want to check out what every Webflow web designer needs to know.
- Developers: Benefit from clean, exportable code for further customization.
- Entrepreneurs: Quickly build and launch professional websites.
- Marketing Professionals: Manage dynamic content with ease and integrate marketing tools seamlessly.
In summary, the Webflow interface is a powerful ally in the world of web design, offering tools that streamline the process and enhance creativity. By understanding and leveraging its features, users can craft websites that are not only visually appealing but also highly functional and responsive. Whether you’re starting from scratch or looking to refine your web presence, Webflow provides the capabilities to turn your ideas into reality.